
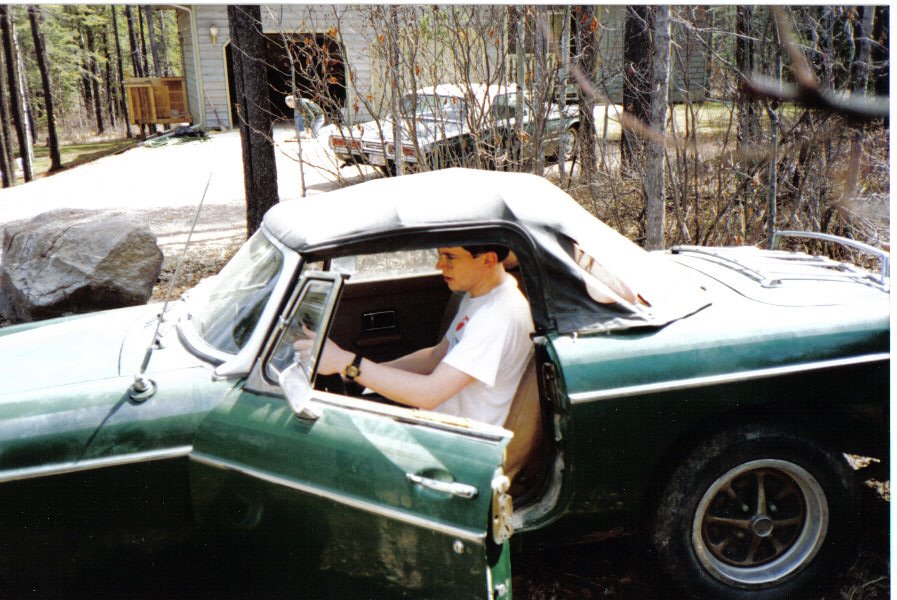
I finally saved up enough money to have the head for the MG rebuilt. I took it to Mic Jones and he did a fantastic job on it. He replaced the valves with bigger ones, both intake and exhaust. All of the valve guides were replaced, and it got triple springs.
Mic asked me why I didn't do this work when I got the motor redone. I told him I thought I had. Turns out Auto-Mann had just done a simple overhaul on the head.
Anyway, I have a new head ready to go on the motor. I ordered a few parts from Moss, including a new high performance head gasket.
Once I had the head back on I took it back to Mic to have the carbs tuned. He tuned them up and the car is running in the best shape of its life.
Baby number two has arrived - Eden Drew.
Tuesday, 5 June 2007
Monday, 23 August 2004
Floated valve
I havent written on this blog for quite a while. I have lots of updates, just none on the car. I got married in 2001 and had my first kid, a boy, Griffin in 2003. Not surprisingly the car was a lower priority for a few years.
In August I decided to take it on a road trip to Edmonton. My friends are members of the West Leduc Antique Society and I was going to go up to participate in the weekend events. Since I hadn't taken the MG for a drive in some time I dusted her off, changed the oil and hit the highway.
The next morning I drove to West Leduc from my buddies house in Edmonton. On the highway it was quite noticeable, the car could really move. Unfortunately I pushed it a little too hard. Somewhere around 160 it choked.
I floated a valve.
I got towed back to the antique show and we took off the tappet cover. Sure enough, one bent valve. I thought about trying to get it back under the rocker but then thought differently. I didnt want to risk a long trip home with a faulty engine.
So I found a car hauler and towed the MG back home (again). And there it sits. Waiting for a new head.
So I found a car hauler and towed the MG back home (again). And there it sits. Waiting for a new head.
Monday, 23 August 1999
New motor - running well
The summer of 1999 my MG was running the best it had ever run since I bought her in 1992. The new engine ran great. A new alternator had fixed the electrical issues. The new interior was like new. I drove that car every opportunity I got.
I even made some long distance trips in the MG, including a few to Edmonton. I tried my best to find some back country roads to drive on when I could. These cars are a lot more fun to drive when the road isnt straight.
I even made some long distance trips in the MG, including a few to Edmonton. I tried my best to find some back country roads to drive on when I could. These cars are a lot more fun to drive when the road isnt straight.
Thursday, 5 March 1998
Rods bachelor party
After having the engine redone the car was an absolute joy to drive. I drove it a lot and then parked it for the winter in my backyard. Come spring it was time to get it out again.
My best friend Rod was having a batchelor party at drumheller provinical park. I decided to drive the MG out there. It is about a 3 hour drive from Calgary and I hadnt put that many highway miles on the car. I was taking a bit of risk but didnt think anything of it.
I got as far as Cluny. Do you want to know whats in Cluny? Not much. The car just stopped firing, turned out the alternator was no good and I had been driving the car on battery power alone. It wouldnt even turn over. So a quick call to the AMA and I got a tow back to Calgary.
It was almost midnight by the time I got home, I loaded up my truck and headed out again. I made to Dinosaur park by 2am just in time to go to sleep.
I can't remember how many times that MG has been towed. Too many. And I am sure it wont be the last.
Sunday, 23 March 1997
More money than brains...
My Dad uses the saying '...got more money than brains...' quite frequently. You would think it would have sunk in. After roaming around Australia for a while, I came home and got another engineering job. I was living at home and pulling in a pretty decent wage. Thanks Mom and Dad for not charging me rent! The MG ran well, and cornered well with those tires, but it needed some more power. I decided to spend some of my hard earned money on a motor rebuild.
I removed the motor from the car with the help of my brother. We took the head off, drained the oil and managed to lift it out of the car with muscle power alone. Once it was out, we took it in to the mechanic. I had the motor rebuilt in Calgary by Auto-Mann. They bored it out to a 2.0l, put in a high lift cam, converted it to twin SU carbs and a few other treats including a header. It took a few weeks to have it all done, and once it was finished they called me to pick it up.
Malcolm gave me pretty strict instructions to not try starting the motor once it was back in the car. He wanted to make sure that all their hard work was not going to go to waste. My Dad and I dropped the motor back in the car and joined it with the transmission once again. Now just to get it back to Auto-mann for start up.
I had a friend who owned a car hauler. He offered to haul the car back to Auto-mann for the finishing work. We loaded up the car up ready for transport when my friend asked me, 'do you want to drive it?'
'Huh?' I replied, 'what do you mean?'
'Hop in the back, you can ride in the car into town. You probably miss driving it, so this is an opportunity for you.'
Well, I couldn't resist, I hoped in the drivers seat and road in the car, on the car hauler, back to Auto-Mann. That must have been quite the sight for passing motorists.
Correction: we made one stop along the way, A charity car washing event. After getting the car nicely polished, we took it to Auto-mann and unloaded it from the car hauler.


Wednesday, 9 October 1996
Wheels make the Ride
I returned from my vacation in Australia and promptly got insurance back on the B so I could drive it. It always amazes me the sense of freedom and exhilaration you get from driving an MGB down a windy mountain road. One thing I noticed when I got back though was that the tires sure liked to squeal on some of those turns. I guess its time to get some new tires...
If I was going to replace the tires, I needed to repaint the rims. I took off the wheels and got the tires removed from the rims at the local gas station. Some planning was required to paint the old rims, and some parts were needed. An order into Moss for the Rostyle paint shield was made, and a trip to the local body shop supply store was done. The guy at the supply store used the old rim to match the paint and make up a couple spray bombs. One for the silver and one for the black. After I had all my supplies in order, time to sand blast the old rims.
I took off all the weights and sandblasted the old rims with a portable sandblaster using play sand. Worked fairly well except that the compressor couldn't put out quite enough air to keep the sandblaster nozzle from getting plugged. Took a full day but managed to get all of the old paint off. Primed the rims and they were ready for paint.
I painted the rims using the Moss supplied Rostyle mask with ok results. The mask didnt do a perfect job, but managed to keep the paint in roughly the right spots. I had to go back with a fine brush to touch up the spots that were missed. Overall, it was worth the purchase, just dont expect it to do all of the work for you.
Once the rims were painted it was time for new tires. I went with a lower profile tire than what is recommended for the car (175/70R14) and bought some Toyo 185/60R14s. I knew the speedometer would be out but I wanted to improve my 0-60 time. I purchased the new tires from OK Tire in Calgary and had them install and balance the tires on my freshly painted rims.
Once the new rims and tires were installed on the car it not only improved handling but made the car look so much better! Slow but sure, that car is turning its life around!
Update: The MG Experience has a really good review of MG tire sizes, http://www.mgexp.com/article/tire-sizes.html
Sunday, 23 June 1996
MGB parked - Down Under
I had the MGB top replaced with the Original Style vinyl top from Moss. The top looked fantastic and had fewer holes in it than the last one. When I had the car in to get the new top put on I had the mechanic do an inspection of the car and tell me what was wrong with it. For the most part the car was in pretty good shape and there was very little rust on it. I had rebuilt the motor, replaced the interior, top and rebuilt the front suspension. What it really needed was some new paint.
I got an estimate to complete the paint job, and it was going to cost me about $3500 to get it done right. I decided that money would be better spent going on a trip, so I parked the MG back in my Grandmas garage and headed out for Australia. The MG was going to have to wait.
Thursday, 23 May 1996
New Top for the MGB
By 1996 I had owned the MG for 3 years. I had rebuilt the motor with the help of my friend, replaced the rotting interior, and installed new carpets. I decided it was time to get a new top. I priced the tops out and decided to go with the Original style economy model from Moss. Fergus from British Auto Specialists in Calgary was all set to do the installation.
The car had been stored in my Grandmas garage for the winter, so I needed to get insurance on it for the drive up to Fergus'. I phoned the insurance company and got the insurance put on for one day. I figured I didnt need a license plate as it was a short trip, so I borrowed the plate off my truck.
As I was travelling along 16th Avenue it occurred to me that it was rush hour. I hadn't planned for that so needed to make a quick detour up to 22nd ave. As I was trying to figure out where I could turn, I ran smack into the back of a Mini Van. I was ok, and so was the lady driving the van, but the MG front bumper had been bent, not to mention the back of the minivan. The crash was hard enough to trigger the safety fuel switch and the engine quit. Had I known how easy it was to reset the switch, I wouldnt have called for AMA to tow the car to the shop!
The police made it to the accident scene and charged me with a few things, but at least I had the insurance! Driving without insurance in Alberta is a $2500 fine, it could have been a whole lot more expensive. I phoned the insurance company and was put through to the same person who had just talked to me about 30 minutes earlier. She was astonished, and told me she had never heard of this happening. Lucky me!
I rode in the tow truck up to the Mechanic, MG in tow and helped them push the car into the yard. They all had a good chuckle at my expense and then set to ripping off the old roof.
2 days later I got a call from Fergus to come and pick up the car, the roof was done. He had also decided to have a look at the brakes and done a complete service on them. Probably a pretty good idea.
I left work early and took the bus up to the MG shop and saw my car sitting out front. The new top looked fantastic! The car was really starting to come together, what really didnt fit into the picture now was those old worn out wheels.
Wednesday, 8 February 1995
Interior DIY
During the Winter of 94-95 I stripped the interior and replaced it. I had parked the car in my Grandmas garage and this allowed me to work throughout the winter on it. My grandma didn't seem to mind much as I always had time for a chat over some tea.
Prior to me purchasing the MGB it had been stored outside for years and the result of having a torn roof, the interior pretty much disintegrated. Not to mention the foul odor. So I set to taking the old carpet, door panels, and seats out of the car.
The seats came out first, and I made sure to take a few pictures of how the seat rails went together. There is a spacer underneath the seat rail that you have to make sure goes in the same way as it came out. I didn't have the cash to redo the seats, I figured that it was leather or nothing. So, I scrubbed the seats as best I could with vinyl cleaner and plenty of elbow grease. Then I took the seat covers off of my 77 Mini 998 and put them on until I could afford leather.
Once the seats were out, the door panels were next. The door panels sit overtop of the carpet in a few places so you need to get the panels out before removing the carpet. The panels come out with a flathead and philips screwdriver. I took out all of the screws in the panels, there are even a couple in the armrests. Then I used the flat screwdriver to pry the door panels off. Once all of the panels were off, I ripped up the carpet.
The amount of effort you will need to use to get the carpets up is directly proportional to the amount of glue used. In my case, sun and rain had pretty much dissolved most of the carpet, not to mention the glue. The carpet came out with the greatest of ease.
I took all the interior bits, except for the seats, and took them directly to the trash bin. The smell immediately improved.
Lucky for me, the floor panels were in pretty good condition. There was very little rust and only surface at that. I scraped them as best I could and vacummed out the dust with a shop vac. A coating of anti rust and some paint and it looked as good as new!
I ordered new carpets and trim kit from the local MG shop. I went with Autumn Leaf for the interior, the original had been pee yellow. The carpet came with some pretty good instructions and I managed the effort on my own. The contact cement was crazy stuff, once it touches there is no getting it apart without tearing the carpet. So make sure you line it up and chalk it before adding the glue. The nice thing about the glue is that it allows you to put the carpet in around curved surfaces, like the rear wheel wells. Try and start at one edge and work your way across the surface, if you get a fold in it there is no way you will get it out.
Once the carpets were in it was time to install the interior trim. Once again the instructions provided with the interior kit were pretty good. Except for one funny horshoe shaped piece, I managed to get them all in. In turns out the horshoe bit goes behind the radio, I elected to leave it out.
Once I had the carpet and interior trim installed I could return the seats. The seat covers really didnt look all that great, especially with my nice new interior, but for now they would have to do. I cleaned and armoralled the interior dash and center console and the car looked fantastic.
Next, a new roof to protect that investment on the interior!
Prior to me purchasing the MGB it had been stored outside for years and the result of having a torn roof, the interior pretty much disintegrated. Not to mention the foul odor. So I set to taking the old carpet, door panels, and seats out of the car.
The seats came out first, and I made sure to take a few pictures of how the seat rails went together. There is a spacer underneath the seat rail that you have to make sure goes in the same way as it came out. I didn't have the cash to redo the seats, I figured that it was leather or
 nothing. So, I scrubbed the seats as best I could with vinyl cleaner and plenty of elbow grease. Then I took the seat covers off of my 77 Mini 998 and put them on until I could afford leather.
Once the seats were out, the door panels were next. The door panels sit overtop of the carpet in a few places so you need to get the panels out before removing the carpet. The panels come out with a flathead and philips screwdriver. I took out all of the screws in the panels, there are even a couple in the armrests. Then I used the flat screwdriver to pry the door panels off. Once all of the panels were off, I ripped up the carpet.
The amount of effort you will need to use to get the carpets up is directly proportional to the amount of glue used. In my case, sun and rain had pretty much dissolved most of the carpet, not to mention the glue. The carpet came out with the greatest of ease.
I took all the interior bits, except for the seats, and took them directly to the trash bin. The smell immediately improved.
Lucky for me, the floor panels were in pretty good condition. There was very little rust and only surface at that. I scraped them as best I could and vacummed out the dust with a shop vac. A coating of anti rust and some paint and it looked as good as new!
I ordered new carpets and trim kit from the local MG shop. I went with Autumn Leaf for the interior, the original had been pee yellow. The carpet came with some pretty good instructions and I managed the effort on my own. The contact cement was crazy stuff, once it touches there is no getting it apart without tearing the carpet. So make sure you line it up and chalk it before adding the glue. The nice thing about the glue is that it allows you to put the carpet in around curved surfaces, like the rear wheel wells. Try and start at one edge and work your way across the surface, if you get a fold in it there is no way you will get it out.
Once the carpets were in it was time to install the interior trim. Once again the instructions provided with the interior kit were pretty good. Except for one funny horshoe shaped piece, I managed to get them all in. In turns out the horshoe bit goes behind the radio, I elected to leave it out.
Once I had the carpet and interior trim installed I could return the seats. The seat covers really didnt look all that great, especially with my nice new interior, but for now they would have to do. I cleaned and armoralled the interior dash and center console and the car looked fantastic.
Next, a new roof to protect that investment on the interior!
Monday, 5 September 1994
MGB Top Down, highway one to Lake Louise
Finally, after 2 years I could enjoy the car. I drove that MGB Roadster just about every day that summer. What a blast to drive, you get such a different perspective of your trip when you have the roof down. And once you get on those windy mountain roads, the car is just so much fun.
By summers end I had a whole bunch of memories and a list of improvements. The repairs would have to get done over the winter. The winters here are way to cold for the MG, and there is too much salt on the roads. I would have to park it in a garage, and a heated one preferably. I asked my Grandmother if I could park it in her garage and she obliged. I think she enjoyed the company, as I always had time for tea.
By summers end I had a whole bunch of memories and a list of improvements. The repairs would have to get done over the winter. The winters here are way to cold for the MG, and there is too much salt on the roads. I would have to park it in a garage, and a heated one preferably. I asked my Grandmother if I could park it in her garage and she obliged. I think she enjoyed the company, as I always had time for tea.
Monday, 15 August 1994
MGB Engine installed back in the car.
It was my final year at school and one of my toughest. My weekends home were spent with family and friends between bouts of homework. I didn't get a chance to work on the MG until after graduation. The motor and the transmission were waiting to go back in the car having been rebuilt earlier.
With the help of my Pops and brother we put the motor and transmission together in Dads garage. Once they were together we hoisted it up with the block and tackle in Pops garage. Now for the car, we pushed it into the garage with the help of a neighbor and set about lowering the drive train back into the car. We spent the weekend getting the car ready to go for the official start.
 I kept an eye on all the gauges when we started the car and was quite concerned that there was no oil pressure. A test of the oil pressure gauge with some compressed air determined the the gauge was not faulty. So, we took off the oil pan and had a look at the oil pump. Sure enough, we had used the wrong oil gasket on the oil pump. Just my luck, this was the one and only part of the engine rebuild that my friend and I had done, without the help of his Dad and brother in Edmonton.
I went to the local MG mechanic and got the proper gasket. We put it in the engine the following weekend and it started; with oil pressure.

With the help of my Pops and brother we put the motor and transmission together in Dads garage. Once they were together we hoisted it up with the block and tackle in Pops garage. Now for the car, we pushed it into the garage with the help of a neighbor and set about lowering the drive train back into the car. We spent the weekend getting the car ready to go for the official start.
I kept an eye on all the gauges when we started the car and was quite concerned that there was no oil pressure. A test of the oil pressure gauge with some compressed air determined the the gauge was not faulty. So, we took off the oil pan and had a look at the oil pump. Sure enough, we had used the wrong oil gasket on the oil pump. Just my luck, this was the one and only part of the engine rebuild that my friend and I had done, without the help of his Dad and brother in Edmonton.I went to the local MG mechanic and got the proper gasket. We put it in the engine the following weekend and it started; with oil pressure.
Thursday, 30 September 1993
MGB Front End In

One weekend home from school I picked up all the parts for the front end and started putting it back together. I cleaned and painted all the front end parts individually, including sandblasting and painting the 1969 cross member. I rented a spring compressor from the local auto parts store and put the springs back in. Once the cross member was rebuilt, I put it back in the car.
Things were running smoothly, until I determined the steering column was too long! Because I was fitting the car with a 1969 front end cross member to lower the car ride height, the steering column would no longer fit. Another delay. I managed to take apart the steering assembly before I had to head back to school.
Pops took the steering column into the local machine shop for me, with the new dimensions. They ended up shortening the shaft by removing a section out of the middle of the shaft.
Another weekend home and we put the steering assembly back together and in the car. Pops had manufactured a couple of steering column adjusters out of a design in the MGB Workshop manual and they worked great. We managed to setup the steering without any problems. Now, the engine.
Wednesday, 1 September 1993
Front end rebuild

After I got back from Switzerland I had a couple weeks before I had to be back at school in Edmonton, plenty of time to get the front end rebuilt. I eased the front end out of car by doing the following.
- Remove the front tires, it makes it easier to remove the front crossmember.
- Under the nuts holding the front anti sway bar to the wishbone arm. These may be tight, you will have to use a tie rod splitter to get them apart.
- Remove the steering rack by undoing the u-joint closer to the steering wheel and undo the four mounting bolts.
- Undo the brake line union nuts and free the brake lines.
- Place a jack under the cross member and undo the four crossmember mounting bolts.
- Ease the cross member assembly down and away from the car.
- Inspect the mounting pads, they may need to be replaced.
I took the whole assembly into the local MG shop and had them look it over. They removed the springs and took apart the kingpin assemblies for me. After inspection we determined the shocks needed to be replaced and the kingpins needed to be redone. More shop time before I would get the car on the road, it was looking like next summer would be when I could finally drive it.
Monday, 16 August 1993
Switzerland!
 In May I headed off to Switzerland to work for a Mechanical Engineering firm on my last practicum. The experience was a once in a lifetime opportunity and I had the chance to work with an exceptional Mechanical Engineering firm in Switzerland. Not only did I learn a lot, I got the chance to travel Europe. Thats me in the picture being taught how to make an authentic Swiss fondue.
My Mom had some relatives in Wales so I made sure to go and see them on my way home. My Mom's cousin was a great help in tracking down a few really good examples of a restored MGB.
 We spotted this blue one in Wales and had the chance to talk to the owner about some of the differences in the North American car and the British one. That night, my Mom's cousin and I were talking over a few pints about the car and he suggested we get an official British "T" reg license plate for the car. A plate with a T as the final letter are reserved for cars built in 1978, the same year as my MGB. My cousin assured me that we would be able to pick one up at the wreckers the next day.
We set out in the morning to find a T-reg license plate for my MGB. After hitting a few of the wreckers we managed to find one. My cousin had brought all the tools required to remove it from the car and we headed home with the plate. My MGB back home was going to get an official British T-reg plate.
Thursday, 4 March 1993
Transmission
 While I had the engine out, I decided that I might as well pull out the transmission and clean it up as well. The transmission drain plug had a slight leak and had managed to coat just about every square inch of the transmission, not to mention other parts of the cars underside.
I jacked the car up as best I could and proceeded to pull out the transmision. The front of the transmission was held up by a rope and 2X4 laid across the top of the front fenders. I put a jack under the center of the transmission and proceeded to remove the transmission.
1. Remove the gearshift cover by unscrewing the 4 mounting screws holding down the cover plate.
2. Raise the rubber boot and remove the gearsift retaining plate and bolts.
3. Get under the car and remove the cable for the tachometer.
4. Remove the bolts holding the clutch slave cylinder in place and set it aside making sure you dont kink the hydraulics hose.
5. Remove the reverse light switch.
6. Disconnect the drive shaft, making sure to mark the driveshaft and the transmission so you know it will be balanced when you put it back together.
7. Disconnect the grounding strap.
8. Remove the Engine restraint rod.
9. Make sure the jack is supporting the weight of the transmission and undo the mounting bolts. There should be four of the them, don't take the cross member off, it will come out all in one piece.
10. Ease the transmission down and either pull it out on the jack (if you have the car raised high enough) or strongarm it on to the floor so you can slide it out from under the car.
I cleaned the transmission with some engine cleaner, a wire brush and an old tooth brush. Once I had it as clean as I thought I could get it, I painted it with a high heat engine paint.
The engine and transmission were ready to go back in the car, but it would all have to wait. I had gotten a job offer to work in Basel, Switzerland for my final work term. It was time to head to Europe!
Monday, 1 March 1993
Reassembly of a Classic Car Engine

Over the Spring semester of school my friend, his brother and Dad helped me to put the MGB Engine back together. I am very grateful to my buddies family for not only being my family away from home when I lived in Edmonton, but for putting up with my English Motor. Thanks Aubrey's!
We slowly but the engine back together, working weekends and evenings when we had the chance. It wasn't easy with having to be in school full time but it was a good way to relax and forget about school.
 Once we got it home I set about painting it. If you look closely at the picture of the primed engine you can see the "Mexican Chromed head".
Friday, 15 January 1993
MGB Parts are in!
I got the phone call from the local MGB parts place. My order had come in! All the bearings, washers and gaskets to put the MGB motor back together. All I needed now was a new head and camshaft.
On a weekend at home I went through all the boxes of stuff that my brother in law had given me with the car and my luck was holding. In one box was a used camshaft and complete head. They both looked like they were in pretty good shape but was hard to tell with all of the caked on gunk. I packed the parts in a cardboard box along with assorted other goodies and headed back to Edmonton for school.
My friend and I took the head and camshaft into the local machine shop that the British car shop guy had recommended. They set about cleaning both heads and cams, the original parts and the ones I had brought back from home.
I got a call from the machine shop to let me know that I was in luck, one of the heads was good, and both camshafts could be used. I just told them to use the best cam, they were going to machine the lobes to provide better performance as well.
When I went to the machine shop a few days later they had told me that they had chromed the head for me. I was shocked, being a traditionalist, I couldn't believe my eyes. "Mexican Chrome" the shop guy informed me, simply put, silver paint. We had a good chuckle about that one, and still laugh about it to this day.
All the parts were in, the head and cam were machined, it was time for reassembly!
Sunday, 20 December 1992
Stripping the Engine
The Engine for my 1978 MGB had been pulled from the car and was in my friends shop. With the help of my friends brother and Dad, both heavy duty mechanics, we systematically took the motor apart. I had a great book, Haynes, MGB, to follow and the four of us spent the evening and next Saturday going through the strip.
The head and manifolds had been removed so we just needed to dissemble the block. The engine was taken apart in the following order;
Once the parts came out of the tank they were coated with oil. We did an inventory of parts, figured out what we required, and made a trip to the local British car shop to place the order. Then all we had to do was wait for the phone call that would tell us the parts had arrived.
The head and manifolds had been removed so we just needed to dissemble the block. The engine was taken apart in the following order;
- Removal of the flywheel. The flywheel bolts have a tab washer that has to be bent back prior to removing the bolts. This was done with a flathead screwdriver and a hammer. The starter ring was in pretty good shape and the clutch surface showed little signs of wear.
- Removal of the oil seal retaining plate. The oil seal retaining plate had tab washers as well that had to be pushed back prior to removing the retaining plate.
- Removal of the engine back plate. Once the back plate was removed the oil seal could come out. Replacement of the oil seal is cheap and should be done regardless of what it looks like.
- Removal of the distributer housing. The distributor housing is held in with a plate; after removal of the plate the housing comes right out with a slight twist.
- Removal of the tappet covers and tappets. Each of the two tappet covers come off with a single bolt. Once the tappet covers are off the tappets can be removed by sticking a finger into the tappet and pulling it out. The tappets were worn and corroded, an indication of what the cam was going to look like!
- Removal of the water pump. The water pump pulley was removed and then the water pump bolts could be accessed. The water pump didn't want to come off and had to be gently tapped with a rubber mallet to come loose. The water pump was slightly corroded but turned well.
- Removal of the oil pan. All of the oil pan bolts were removed and the pan given a tap with a rubber mallet to break the seal.
- Removal of the oil pump. The oil pump was unbolted from the block and removed.
- Removal of the timing chain cover. The front crank bolt had a tab washer on it that had to be pushed back before removal. When trying to loosen the front crank bolt the crank just turned, a good sign!, so we stuck a 2X4 in the crank to prevent the crank from turning while we loosened the bolt. Once the bolt was removed the pulley could be removed. Next the timing chain cover was unbolted and tapped with a rubber mallet to remove it.
- Removal of the timing chain. The timing chain tensioner was removed, it showed considerable wear. Another tab washer on the large gear was pushed back and the gear was removed. The gears and chain were pulled off in one piece. Keys in the cam and crank were taken off and stored with the gears.
- Removal of the cam. The camshaft had a retaining plate that was removed. Then the cam could be eased out. The cam was in very poor shape. The lobes were almost round and deeply scored. It would have to go to the machinist to see if it could be repaired.
- Removal of the front plate. Now that the timing chain was off the front plate could be removed.
- Removal of the pistons. The end caps were loosened and removed, it should be noted that the nuts were 12 point nuts. Once the caps were off the pistons were pushed out through the top of the motor. The sleeves had a bit of a ridge but no major scores.
- Removal of the main bearing caps. The bolts on the bearing caps were removed and a puller was fitted to the caps. The puller did the trick as the caps were tight. We stamped the caps to make sure they would be put back in the right place. The bearings had little wear, as did the crank and the thrust bearings.
- Removal of the crank. The crank was lifted out and placed aside. It was in great shape and showed no signs of wear.
Once the parts came out of the tank they were coated with oil. We did an inventory of parts, figured out what we required, and made a trip to the local British car shop to place the order. Then all we had to do was wait for the phone call that would tell us the parts had arrived.
Monday, 16 November 1992
Pulling the Engine
 In September I headed back to school and left the MG behind. I started my studies and dreamed of getting the MG back on the road. One of my friends at school suggested I bring the engine back to school after the Christmas break. His dad had a great shop to work in and would help us take the engine apart and rebuild it. Enough said, I made plans to get the motor out of the car.
 The car was stored outside, thankfully the winter was mild so we wouldn't have to work in the snow. Pops, my brother and I managed to take the motor out of the car armstrong style. The head had been taken off by my brother in law, so we didn't have to bother with draining the coolant or antifreeze, it had already been done. We removed the hood and disconnected the dead battery (just in case). Then we disconnected the oil pressure gauge wire that runs to the motor and took out the distributer. We disconnected the heater control unit and then removed the starter. We figured the more stuff we removed from the engine, the lighter it would be when we attempted to yank it out. All of the Exhaust Gas Recycling equipment had been removed already so we didn't have to worry about removing the air pump or any of the associated equipment. We pulled out the radiator, we figured we might need the room and I was going to have it cleaned up anyway. We laid a 2X4 across the front fenders close to the windshield and tied a rope around the transmission, securing it to the 2X4. We loosened the engine mounting bolts and the bolts that hold the transmission bellhousing to the engine. We were ready to try pulling out the motor.
Pulling out the 1.8 litre engine by hand was a lot easier than we anticipated. By stripping the motor down as best we could we reduced the weight significantly. The three of us pulled the motor forward and it slipped right off the transmission. After catching our breath we lifted the motor over the bumper and gently put it on the ground in front of us. The motor had been freed!
 Now that the motor was out of the car, all we had to do was get it out of the bush and into Pops truck. The thought of carrying the motor through the bush and lifting it into the truck was daunting so we hatched a brilliant plan. We commandeered my nephews wagon, loaded the motor into it and hauled it to the truck. The wagon strained under the pressure but luckily, didn't fall apart!
I drove the truck back to school, engine securely fastened in the back and dropped the motor off at my friends garage. My friend, his Dad and I made plans to start taking it apart that weekend.
Saturday, 5 September 1992
Towing the MG Home
In late October I finished making the required payments to my sister and brother in law for the MG, so it was time to get it off their front lawn. I borrowed my Pops truck and headed off to a rental place in town and rented a 20 foot flatbed trailer; then it was off to my sisters place. I hadn't seen the vehicle in a while so was quite surprised when I pulled up to the house.
The car was in pieces. My brother in law had started taking apart the motor. The manifolds and head were off, the head showed a significant amount of burn and a couple cracks around the exhaust ports. The interior was unsalvagable, the car had spent a considerable amount of time out in the open with the roof down. It wouldn't really have mattered if the roof was up, as the roof had a couple 2 foot splits in it. The rear trunk had a serious wow in it, the result of a heavy luggage rack being installed and only the one sided trunk support to hold it up. The driver side quarter panel had been pushed in, probably by an improperly placed power pole. The paint was dead but the rest of the body was solid, the car had very little rust.
We loaded up the MG onto the flatbed and made sure it was strapped down. It look us longer to load all the extra parts my brother in law had in boxes than to load the car itself. He had purchased a complete (used) 1969 MGB front end that he was intending to install to lower the ride height of the car. 

We got the car safely to my parents place and managed to park it in the bush, somewhat out of the way of regular traffic. I covered the car, probably for the first time in its life. It would be staying there for the winter while I finished school.
After unloading the car my sister made me make a deal on the purchase of the car. If I was ever to sell it, I had to sell it back to her, I could tell she still had an emotional attachment to it.
Subscribe to:
Posts (Atom)
